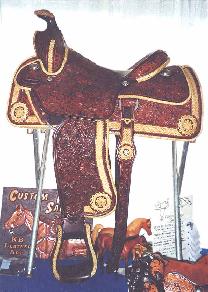
This one goes under braidwork! :) The story begins at BreyerFest 2000, where we saw Kathleen Bond's rawhide braided saddle (full scale) in her booth along the concourse. Reference pix were taken; one appears below. I knew it would take time to amass the experience to tackle such a daunting project. I have always loved braidwork, and always loved Western saddles. Still, in real life, I had seen very few pieces that combined these two...some braid-covered stirrups in a catalog, Sergeant's braided cantles. (Even now, the total sum is about 3 saddles.) It was a lot to bite off! When I finally began (in October 2001) I started, for reasons of nervousness, with the stirrups.
The right material to do the rawhide was long in coming. Sinew was an obvious choice, but it is hard to work with and tends to turn translucent if pulled against a dark surface. One day I walked into an Amish harness shop and spied rolls of heavy linen thread. Unlike normal waxed linen thread, this stuff untwisted to 6 and I liked the color: a very light yellow-cream. In the end, it was too light, so I came up with a 'pale dye' by mixing dye with solvent. The rolls were dipped before working and brushed with dye after the braiding. One of the benefits of extremely pale or weak dyes is that the effect of one coat is so small you can make lots of mistakes. :) Another challenge to do with color was cleanliness (common to all miniatures-making). I find it necessary to wash hands every hour or so when working with this thread, and the worktop too: the braidwork picks up dirt something terrible.
 :( After braiding, I brushed on Super Shene, often several layers, drying between each one. As a finishing sealant, I tried Fray Check on top of the Super Shene. Amazingly, it seems to work.
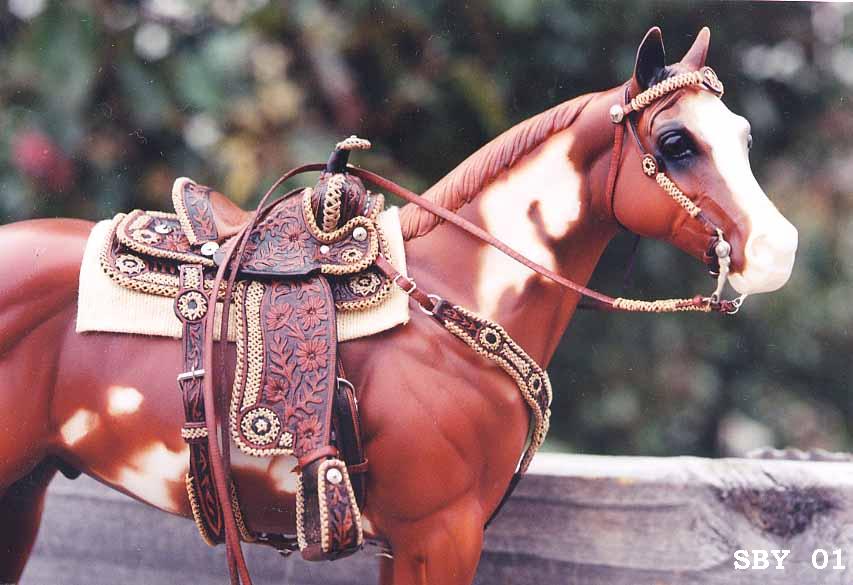
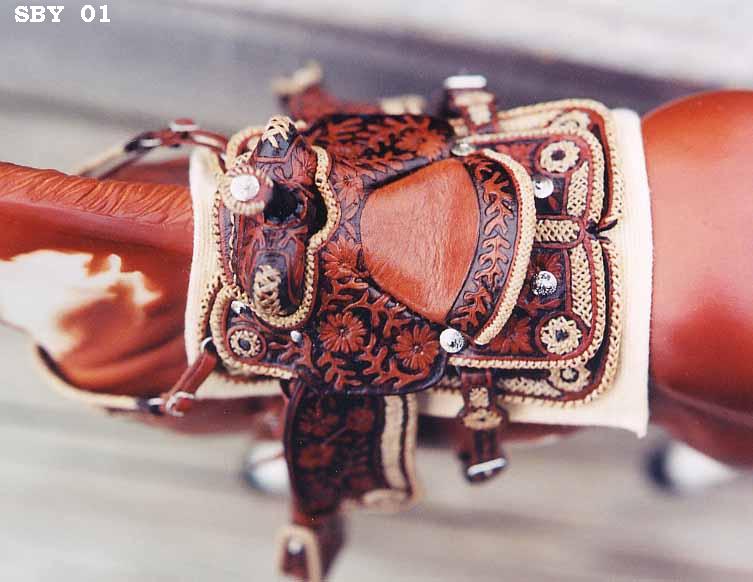
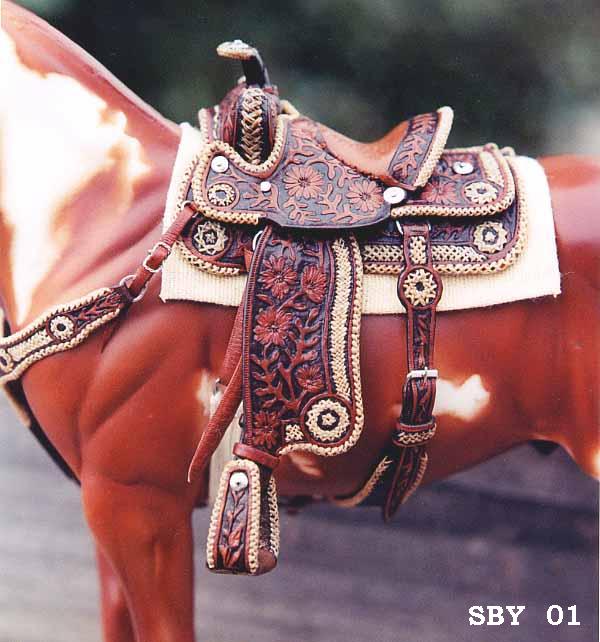
Braidwork Notes. The edge braiding on #423 is largely done with 1-string, continuous 4-strand round braid. This is Grant's Plate 35 in his Leather Braiding book. As ever with miniature braidwork, starting and stopping are the hard parts! The cantle was done as an experiment (successfully, thank goodness) using 5 holes instead of 4. It looks like a six-strand to me,...it's not in the book. (Instruction books are like that. You have to extrapolate.) The rosettes are mostly of two kinds, star and two-strand applique. Kathleen herself showed me how to do stars. There is a star on the browband (hard to see). Also, the star in the center of the breastcollar (see pic below) has been rebraided since these pix were taken. Some of the rosettes on the breastcollar and upper parts were 8-, 9- and 10-point stars done in the same way as a five-point star. I like to put at least one star on every saddle I make (usually on the horn); this is to honor the ship, the Timaru Star. :)
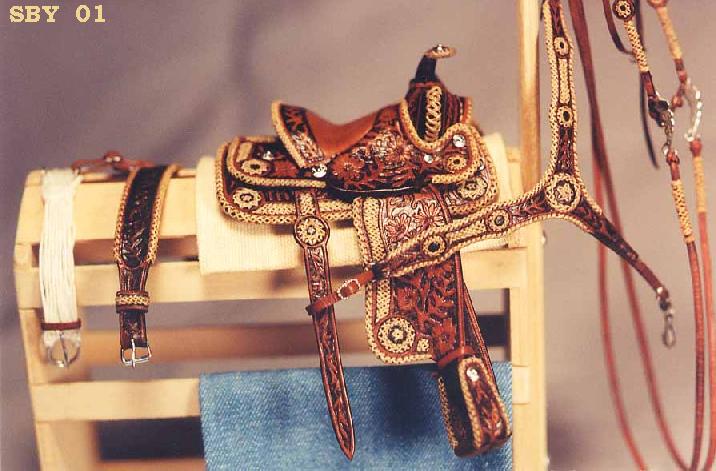
The bars, or bands, of flat braidwork are all 3-strand applique. The same technique, found on Grant's Plate 75, was used for the larger rosettes on the fenders and base plate. It creates a flat 5-strand braid. I discovered that the tool used to punch the holes for the braidwork made a difference. If slits were placed parallel to the braiding edge, the rosette or star had a snowflakelike branching appearance. If a vertical slit, or a point needlehole, was used, the star had real points.
 Considerable difficulty was encountered getting everything even, doing the ends of the bars, and dealing with leather damaged by too many needleholes. My biggest goof was the breastcollar: I cut it out in three pieces, (thus necessitating sewing up the center) completely forgetting that I'd be putting braidwork on that very spot. Model tack is like that: you have to solve a whole string of problems! The solution came to me: I'd never done an edged medallion before, but it seems to work. :)
In her books, champion braider Gail Hought expresses the three factors that go into prizewinning braided tack: the quality of the materials, the execution of the braiding, and the design of the whole piece. They all weigh equally. This applies to model tack just as much. The great challenge of #423 was to use what braids I knew, and that looked good at that scale (how much, after all, can the human eye pick up in one-eighth of an inch?!), and to create a saddle that followed the TSII tradition. In short, I chose not to do an exact portrait set.
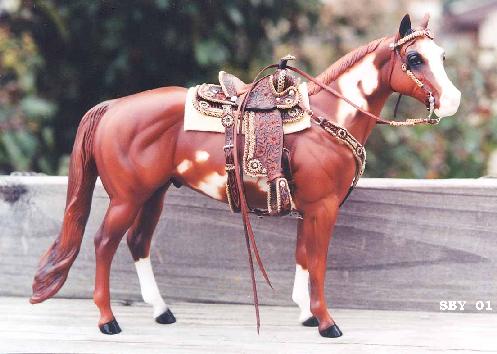
 The breastcollar and back cinch are my own design. What I am particularly proud of, along these lines, are the skirts. Note that the base skirt has a horizontal bar of braiding and the second skirt has a vertical. Yet they balance each other so perfectly that the eye is fooled, and does not see the assymmetry.
For cute, dig those back cinch keepers---my favorite---upon completion, they reminded me of dice cups!
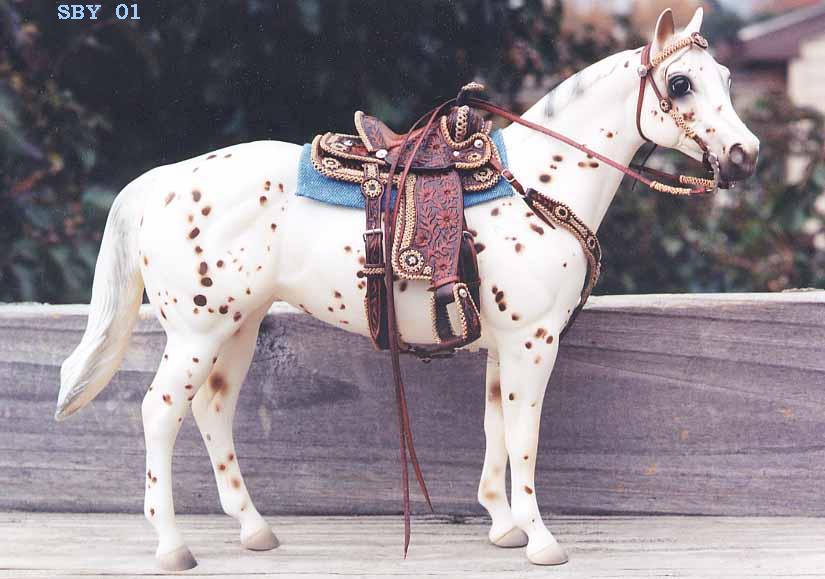
The absolute hardest part, believe it or not, was choosing what kind of blanket to use! After a month of intensity, I wasn't ready for a tooled-strip approach. When I saw how good blue denim looked with #423, I made a blanket out of it. Then I test-dyed a scrap of white denim with the same dye the threads had taken. Presto. That was even more of a hit. Truly, the blanket can make or break a set. It's a pity that blankets usually come AFTER you've used up your brain cells on the saddle...!
The bridle did, indeed, come after the saddle AND the blanket. But I'd had a long time to ponder it and a practice piece as well (see R. Nikolaidis' bridle & bcs on the Braidwork page).
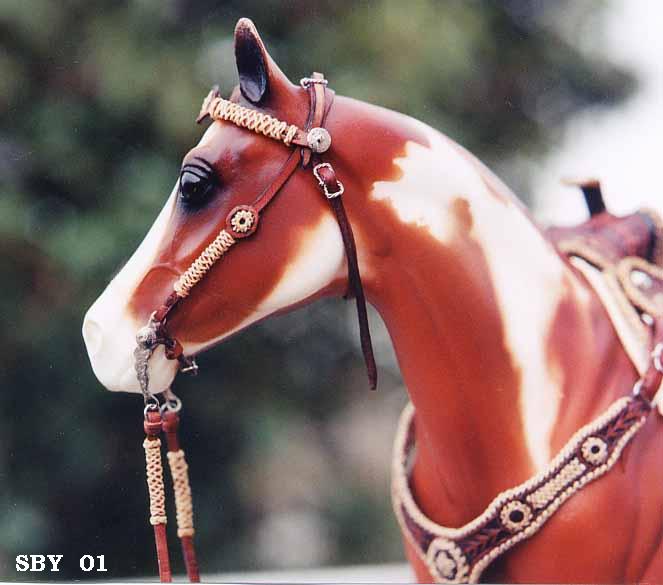 For blanket and bridle I was on my own, no hints. Click on the bridle pic for a larger view. Although the majority of the bridle does not match the majority of the saddle, enough factors (the thread, the rosettes, the color) are in sync to make the transition smooth. The bit is an L.E.Ross/Sulser customized with a Rio Rondo concho.
It has taken me 22 years to get to where I could make this saddle in a month. I am very pleased with it; the techniques will go on to be used for many other sets. The only drawback to such a crowning piece of tack is a lack of strength: the waxed linen thread will not take much pressure. Sinew would have been less 'squishable' and might eventually rebound; waxed thread has to be guided back into looking good. Sealant takes care of some of this; but I had to invent a new method of setting pins because I could not squeeze pliers over the finished edges of the saddle! There is inevitably some sacrifice of strength when striving for this level of detail. The TSII has always valued strength in tack (playability, 'feel' of adjustment, and durability) extremely highly. A small slide towards weakness looms large for us.
And yet, perhaps, the beauty of these pieces justifies it...